


I did a broad research on deploying WSO2 products on Cloud Foundry and I was able to deploy the samples of WSO2 MSF4J on Cloud Foundry. WSO2 MSF4J is a lightweight, high performance framework for building Microservices in Java.
Unlike other WSO2 products, MSF4J supports HTTP and it is not redirected to HTTPS unless specified. Also exposing one port is sufficient to run the product. Therefore, it is feasible to deploy it on Cloud Foundry under the current status.
Here's how I got through the process. I tried 3 possible ways to deploy the product. They are as follows.
2. Used Diego, Cloud Foundry’s new elastic run time and deployed with Java buildpack.
3. Used the docker image for MSF4J and deployed it with Diego.
Let me explain the three approaches separately. I will describe all the details from the set up to the deployment, so stay tuned.
1. Using BOSH-Lite, Cloud Foundry and Java buildpack
Before deploying Cloud Foundry, you have to set up Bosh-lite.
Bosh-lite is a lite development environment for BOSH. Using bosh-lite, we can deploy Cloud Foundry locally in our machine and set up a local development environment for BOSH using Warden containers in a Vagrant box.
I will walk through the process of deploying Cloud Foundry with BOSH Lite. BOSH and BOSH Lite can be used to deploy just about anything once you've got the hang of it.
Prepare the environment
1. Install latest version of bosh_cli.
2. Install Vagrant
If you get into trouble while installing Vagrant, refer my blog post. To see if you have installed Vagrant properly, check the version.
4. Now, Target the BOSH Director. When prompted to log in, use admin/admin.
I will walk through the process of deploying Cloud Foundry with BOSH Lite. BOSH and BOSH Lite can be used to deploy just about anything once you've got the hang of it.
Install Bosh-Lite
Repo: BOSH Lite
1. Install latest version of bosh_cli.
$ gem install bosh_cli --no-ri --no-rdocIf you get into trouble while installing Vagrant, refer my blog post. To see if you have installed Vagrant properly, check the version.
$ vagrant --version
Vagrant 1.7.4
3. Clone the repository of Bosh-Lite from https://github.com/cloudfoundry/bosh-lite.git.
$ cd ~/workspace
$ git clone https://github.com/cloudfoundry/bosh-lite
Install and boot a virtual machine
1. There are various Vagrant providers. I prefer Virtual Box and I will use that to explain the process. You can instead use your favorite Vagrant provider. (For eg: AWS).
If you get into trouble while installing Virtual Box, refer my blog post. Make sure your machine has at least 8GB RAM, and 100GB free disk space. To see if you have installed VirtualBox properly, check the version.
If you get into trouble while installing Virtual Box, refer my blog post. Make sure your machine has at least 8GB RAM, and 100GB free disk space. To see if you have installed VirtualBox properly, check the version.
$ VBoxManage --version
4.3.36_Ubuntur105129
2. Start Vagrant from the base directory of BOSH-Lite repository, which contains the Vagrantfile. The most recent version of the BOSH Lite boxes will be downloaded by default from the Vagrant Cloud when you run vagrant up. If you have already downloaded an older version you will be warned that your version is out of date.
$ vagrant up --provider=virtualbox
When you are not using your VM, it is recommended to pause the VM from the VirtualBox UI (or use vagrant suspend), so that VM can be later simply resumed after your machine goes to sleep or gets rebooted. Otherwise, your VM will be halted by the OS and you will have to recreate previously deployed software.
3. If behind a proxy, exclude both the VM's private IP and xip.io by setting no_proxy.
$ export no_proxy=xip.io,192.168.50.4$ bosh target 192.168.50.4 lite
Target set to 'Bosh Lite Director'
Your username: admin
Enter password: *****
Logged in as 'admin'
5. Add a set of route entries to your local route table to enable direct Warden container access every time your networking gets reset (e.g. reboot or connect to a different network). Your sudo password may be required.
$ bin/add-route
For more information, follow https://github.com/cloudfoundry/bosh-lite.
This is already described in the previous section. You can use the VirtualBox or AWS providers to spin up BOSH-Lite.
Deploy Cloud Foundry on BOSH-Lite
Setup a BOSH-Lite Vagrant VM
Deploy Cloud Foundry
>>> Create a Deployment Manifest for Cloud Foundry on BOSH-Lite
Step 1: Clone the cf-release GitHub Repository.
$ git clone https://github.com/cloudfoundry/cf-release.git
Step 2: Generate the Manifest.
Ensure that you have the most up-to-date version of the Cloud Foundry code and all required submodules.
Ensure that you have the most up-to-date version of the Cloud Foundry code and all required submodules.
1. From the cf-release directory that you cloned when you created the manifest, run the update script to fetch all the sub modules.
2. Install the Ruby version listed in the cf-release/ruby_version file of the cf-release repository. You can manage your Ruby versions using rvm, rbenv, or chruby.
$ cd cf-release
$ ./scripts/update
Spiff is a tool for generating BOSH manifests that is required in some of the scripts used below. Install spiff according to its README. I found built binaries from here: https://github.com/cloudfoundry-incubator/spiff/releases. Then I downloaded one and put it in a directory that is in the search path (PATH env variable), and it worked fine. I will describe the steps one by one here.
- Download the binary at https://github.com/cloudfoundry- incubator/spiff/releases/download/v1.0.7/spiff_linux_amd64.zip.
- Extract it.
- Set the path as below.
$ export SPIFF_HOME=/home/nanduni/Downloads/spiff
$ export PATH=$PATH:$SPIFF_HOME
5. Use the scripts/generate-bosh-lite-dev-manifest command to create a deployment manifest and set it as the current BOSH deployment.
$ cd cf-release
$ ./scripts/generate-bosh-lite-dev-manifest
>>> Deploying Cloud Foundry using BOSH
Open https://bosh.io/stemcells to view the current list of publicly available BOSH stemcells. Run bosh upload stemcell STEMCELL-PATH to upload your stemcell to the BOSH Director, where STEMCELL-PATH is the location of your downloaded stemcell file.
bosh upload stemcell ~/downloads/light-bosh-stemcell-3202-aws-xen-hvm-ubuntu-trusty-go_agent.tgz
2. Build the Cloud Foundry Release.
Use bosh create release to create a Cloud Foundry release. After some processing, this command prompts you for a development release name. The release names correspond to the files in cf-release/releases.
3. Upload the Cloud Foundry Release.
bosh upload release
4. Deploy!
bosh deploy
>>> Verify the Deployment
Run bosh vms. This command provides an overview of the virtual machines that BOSH manages as part of the current deployment. The state of every VM should show as running.
$ bosh vms

+-----------------------------+---------+------------------+---------------+
| Job/index                   | State   | Resource Pool    | IPs           |
+-----------------------------+---------+------------------+---------------+
| nfs_server/0                | running | nfs_server       | 10.146.21.174 |
| ccdb/0                      | running | ccdb             | 10.146.21.175 |
| cloud_controller/0          | running | cloud_controller | 10.146.21.176 |
| collector/0                 | running | collector        | 10.146.21.178 |
| health_manager/0            | running | health_manager   | 10.146.21.173 |
| nats/0                      | running | nats             | 10.146.21.172 |
| router/0                    | running | router           | 10.146.21.171 |
| syslog/0                    | running | syslog           | 10.146.21.177 |
| uaa/0                       | running | uaa              | 10.146.21.180 |
| uaadb/0                     | running | uaadb            | 10.146.21.179 |
| dea/0                       | running | dea              | 10.146.21.181 |
| saml_login/0                | running | saml_login       | 10.146.21.181 |
+-----------------------------+---------+------------------+---------------+
>>> Update Cloud Foundry
If you make changes to your manifest, run bosh deploy to update your Cloud Foundry deployment with these changes.
If you make changes to the cf-release directory, run the following commands to update your Cloud Foundry deployment with these changes.
$ bosh create release && bosh upload release && bosh deploy
Pushing an application to Cloud Foundry
$ cf push hellowso2 -p /home/nanduni/msf4j/test/helloworld-1.0.0.jar -b https://github.com/cloudfoundry/java-buildpack.git
Let's move to the next approach.
2. Using cloudfoundry/BOSH-Lite set up, Diego BOSH release and Java buildpack
Install BOSH-Lite
This has been described earlier. I assume that you have now successfully set up BOSH-Lite environment and so let's proceed with next step of deploying Diego to BOSH-Lite.
Deploying Diego to BOSH-Lite
This repo is a BOSH release for deploying Diego and associated tasks for testing a Diego deployment. Diego builds out the new run time architecture for Cloud Foundry, replacing the DEAs and Health Manager. This release relies on a separate deployment to provide Consul, NATS and Loggregator. In practice these come from cf-release.
Once you have installed and started BOSH-Lite, you are ready to deploy Diego to BOSH-Lite.
1. Upload the latest version of the Warden BOSH-Lite stemcell directly to BOSH-Lite.
$ bosh upload stemcell https://bosh.io/d/stemcells/bosh-warden-boshlite-ubuntu-trusty-go_agent $ curl -L -o bosh-lite-stemcell-latest.tgz https://bosh.io/d/stemcells/bosh-warden-boshlite-ubuntu-trusty-go_agent
$ bosh upload stemcell bosh-lite-stemcell-latest.tgz
Release Compatibility
Diego releases are tested against Cloud Foundry, Garden, and ETCD. Compatible versions of Garden and ETCD are listed with Diego on the Github releases page or diego-cf-compatibility. For eg: I used the following release versions.
$ cd ~/workspace
$ git clone https://github.com/cloudfoundry/cf-release.git
$ cd ~/workspace/cf-release
$ git checkout v230
$ ./scripts/update$ cd ~/workspace
$ git clone https://github.com/cloudfoundry-incubator/diego-release.git
$ cd ~/workspace/diego-release
$ git checkout v0.1450.0
$ ./scripts/updateThis has been explained in a previous section of the first approach.
5. Generate the CF manifest.
$ cd ~/workspace/cf-release
$ ./scripts/genearte-bosh-lite-dev-manifest
6. Generate the Diego manifests.
7. Create, upload, and deploy the CF release.
8. Upload the latest garden-linux-release.
9. Upload the latest etcd-release
11. Login to Cloud Foundry.


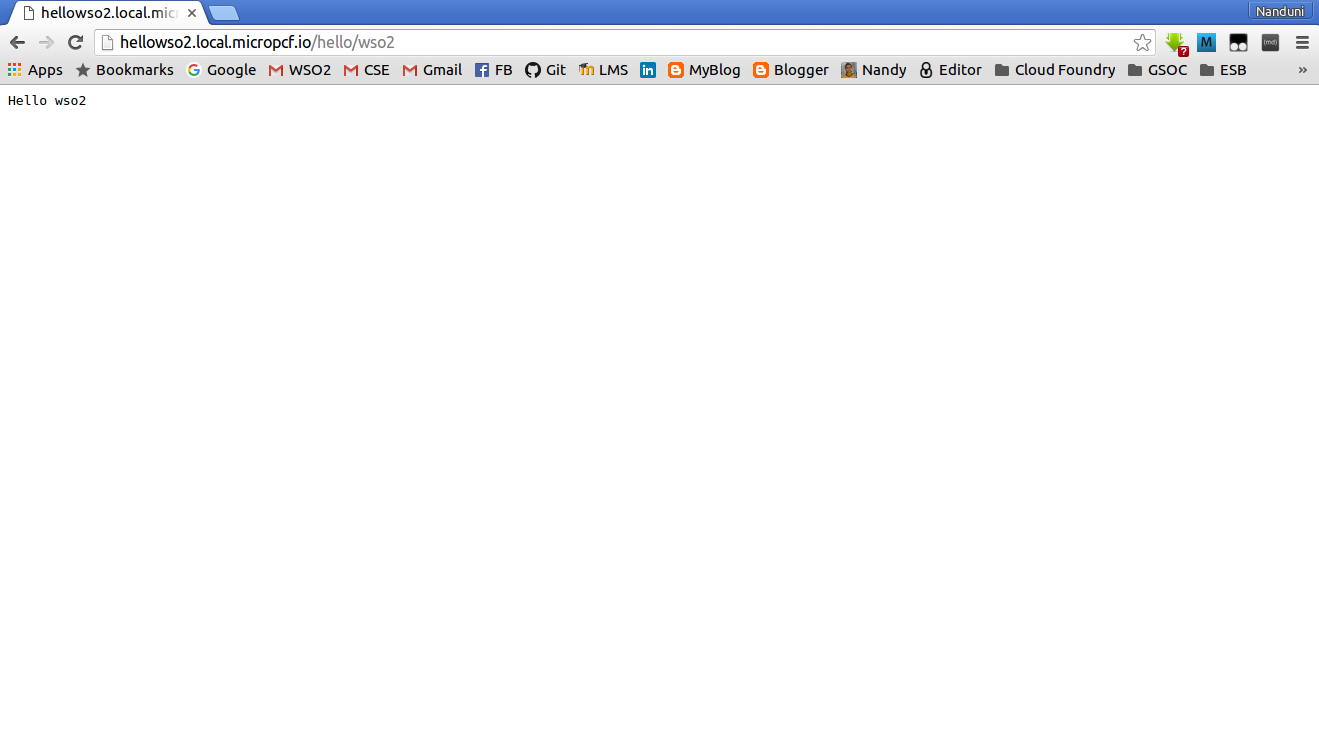
If you have used MicroPCF(PCF Dev), you could see the running application at hellowso2.local.micropcf.io/hello/wso2.

7. Use the docker login command to log into the Docker Hub from the command line.
8. Type the docker push command to push your image to your new repository.
$ cd ~/workspace/diego-release
$ ./scripts/genearte-bosh-lite-dev-manifests$ cd ~/workspace/cf-release
$ bosh deployment bosh-lite/deployments/cf.yml
$ bosh -n create release --force &&
$ bosh -n upload release &&
$ bosh -n deploy$ bosh upload release https://bosh.io/d/github.com/cloudfoundry-incubator/garden-linux-release$ bosh upload release https://bosh.io/d/github.com/cloudfoundry-incubator/etcd-release
10. Create, upload, and deploy the Diego release.
$ cd ~/workspace/diego-release
$ bosh deployment bosh-lite/deployments/diego.yml
$ bosh -n create release --force &&
$ bosh -n upload release &&
$ bosh -n deploy$ cf login -a api.bosh-lite.com -u admin -p admin --skip-ssl-validationCreating and targeting a CF org and space
You can target any org or space you require by creating them as required. An example scenario is shown below.
$ cf api --skip-ssl-validation api.bosh-lite.com
$ cf auth admin admin
$ cf create-org diego
$ cf target -o diego
$ cf create-space diego
$ cf target -s diego
MicroPCF( Now this is known as 'PCF Dev')
Repo: https://github.com/pivotal-cf/pcfdev
You can set up Diego environment with MicroPCF as an alternative to above explained long process. Vagrant up will carry out all the aforementioned steps and make everything easy for you.
You can set up Diego environment with MicroPCF as an alternative to above explained long process. Vagrant up will carry out all the aforementioned steps and make everything easy for you.
This would take 10-15 minutes to start the servers. Then you can login to MicroPCF(PCF Dev).

nanduni@nanduni-TECRA-M11:~$ cf login -a api.local.micropcf.io --skip-ssl-validation
API endpoint: api.local.micropcf.io

Email> admin
Password>
Authenticating...
OK

Targeted org micropcf-org
Targeted space micropcf-space

API endpoint: https://api.local.micropcf.io (API version: 2.48.0)
User: admin
Org: micropcf-org
Space: micropcf-space
Pivotal Web Services (PWS)
This is also another alternative to set up the diego environment. But this is a commercial implementation. You can sign up for free and try out the 60 day free trial session at https://run.pivotal.io/.
Once you sign up, you will get the following screen to log in. enter your credentials and log in.

Then you will be navigated to PWS dashboard.

Log into PWS via command line interface using your credentials.

Log into PWS via command line interface using your credentials.
nanduni@nanduni-TECRA-M11:~$ cf login -a api.run.pivotal.io --skip-ssl-validation
API endpoint: api.run.pivotal.io

Email> nandunibw@gmail.comPassword>
Authenticating...
OK

Targeted org nanudnibwTargeted space development

API endpoint: https://api.run.pivotal.io (API version: 2.52.0)
User: nandunibw@gmail.com
Org: nandunibw
Space: development
You can set up the Diego environment in either of the ways which I have explained. Then you are ready to push the applications.
Here we go ...
Pushing a CF Application to the Diego backend
I have cloned the MSF4J repo and then tried out the HelloWSO2 sample in Cloud Foundry. First you need to build the sample using 'mvn clean install' and then a jar file would be created in the target directory. You are now ready to push that jar file(in my case: helloworld-1.0.0.jar) to Cloud Foundry.
Change into your application directory containing that jar file and push your application without starting it. Otherwise you can specify the path in the command.
3. Starting a new application on Diego.
To start a new application on Diego we must push the application without starting it. Once the app is created, we can set the diego boolean on it and then start it.
1. Push the application without starting it.
$ cf push hellowso2 -p /home/nanduni/msf4j/test/helloworld-1.0.0.jar -b https://github.com/cloudfoundry/java-buildpack.git --no start
2. Set the diego boolean.
$ cf enable-diego hellowso2
$ cf start hellowso2
Simply setting the diego boolean via cf enable-diego hellowso2 will cause an existing application to transition to Diego. The application will immediately start running on Diego and will eventually stop running on the DEAs. While this gives some safety, there are no strong guarantees around up time.
Now you can check your working application through browser.
If you have used PWS,
The console logs for PWS would be as follows.
nanduni@nanduni-TECRA-M11:~$ cf push hellowso2 -p /home/nanduni/msf4j/test/helloworld-1.0.0.jar -b https://github.com/cloudfoundry/java-buildpack.git

Creating app hellowso2 in org nanudnibw / space development as nandunibw@gmail.com...

OK


Using route hellowso2.cfapps.io

Binding hellowso2.cfapps.io to hellowso2...

OK


Uploading hellowso2...

Uploading app files from: /home/nanduni/msf4j/test/helloworld-1.0.0.jar
Uploading 10.9M, 3914 files

Done uploading

OK


Starting app hellowso2 in org nanudnibw / space development as nandunibw@gmail.com...

Creating container

Successfully created container

Downloading app package...

Downloaded app package (5.1M)

Staging...

-----> Downloading Open Jdk JRE 1.8.0_73 from https://download.run.pivotal.io/openjdk/trusty/x86_64/openjdk-1.8.0_73.tar.gz (0.6s)
Expanding Open Jdk JRE to .java-buildpack/open_jdk_jre (1.0s)
-----> Downloading Open JDK Like Memory Calculator 2.0.1_RELEASE from https://download.run.pivotal.io/memory-calculator/trusty/x86_64/memory-calculator-2.0.1_RELEASE.tar.gz (0.0s)
Memory Settings: -XX:MaxMetaspaceSize=104857K -Xss1M -Xmx768M -Xms768M -XX:MetaspaceSize=104857K

Staging complete


Uploading droplet, build artifacts cache...

Uploaded droplet (47.1M)

Uploading complete

1 of 1 instances running


App started


OK


App hellowso2 was started using this command `CALCULATED_MEMORY=$($PWD/.java-buildpack/open_jdk_jre/bin/java-buildpack-memory-calculator-2.0.1_RELEASE -memorySizes=metaspace:64m.. -memoryWeights=heap:75,metaspace:10,native:10,stack:5 -memoryInitials=heap:100%,metaspace:100% -totMemory=$MEMORY_LIMIT) && JAVA_OPTS="-Djava.io.tmpdir=$TMPDIR -XX:OnOutOfMemoryError=$PWD/.java-buildpack/open_jdk_jre/bin/killjava.sh $CALCULATED_MEMORY" && eval exec $PWD/.java-buildpack/open_jdk_jre/bin/java $JAVA_OPTS -cp $PWD/. org.wso2.msf4j.example.Application`


Showing health and status for app hellowso2 in org nanudnibw / space development as nandunibw@gmail.com...

OK


requested state: started

instances: 1/1

usage: 1G x 1 instances

urls: hellowso2.cfapps.io

last uploaded: Mon Apr 4 09:56:18 UTC 2016

stack: cflinuxfs2

buildpack: https://github.com/cloudfoundry/java-buildpack.git


   state   since                  cpu  memory  disk    details

#0 running 2016-04-04 03:26:51 PM 0.0% 0 of 1G 0 of 1G
Now you can check your app working.
If you have used PWS, the url would be http://hellowso2.cfapps.io/hello/wso2.
The status of the application can be viewed from PWS dash board too.

If you have used MicroPCF(PCF Dev),
The console logs for MicroPCF would be as follows.
nanduni@nanduni-TECRA-M11:~/msf4j/test$ cf push hellowso2 -p /home/nanduni/msf4j/test/helloworld-1.0.0.jar -b https://github.com/cloudfoundry/java-buildpack.git

Creating app hellowso2 in org micropcf-org / space micropcf-space as admin...

OK

Creating route hellowso2.local.micropcf.io...

OK

Binding hellowso2.local.micropcf.io to hellowso2...

OK

Uploading hellowso2...

Uploading app files from: /home/nanduni/msf4j/test/helloworld-1.0.0.jar

Uploading 11.1M, 3916 files

Done uploading

OK

Starting app hellowso2 in org micropcf-org / space micropcf-space as admin...

Creating container

Successfully created container

Downloading app package...

Downloaded app package (5.1M)

Staging...

-----> Java Buildpack Version: 73f12f6 | https://github.com/cloudfoundry/java-buildpack.git#73f12f6
-----> Downloading Open Jdk JRE 1.8.0_73 from https://download.run.pivotal.io/openjdk/trusty/x86_64/openjdk-1.8.0_73.tar.gz (1m 42s)
Expanding Open Jdk JRE to .java-buildpack/open_jdk_jre (2.4s)
-----> Downloading Open JDK Like Memory Calculator 2.0.1_RELEASE from https://download.run.pivotal.io/memory-calculator/trusty/x86_64/memory-calculator-2.0.1_RELEASE.tar.gz (2.5s)
Memory Settings: -Xmx768M -Xms768M -XX:MetaspaceSize=104857K -XX:MaxMetaspaceSize=104857K -Xss1M
Exit status 0

Staging complete

Uploading droplet, build artifacts cache...

Uploading droplet...

Uploading build artifacts cache...

Uploaded build artifacts cache (43.6M)

Uploaded droplet (47.1M)

Uploading complete

0 of 1 instances running, 1 starting

1 of 1 instances running

App started

OK


App hellowso2 was started using this command `CALCULATED_MEMORY=$($PWD/.java-buildpack/open_jdk_jre/bin/java-buildpack-memory-calculator-2.0.1_RELEASE -memorySizes=metaspace:64m.. -memoryWeights=heap:75,metaspace:10,native:10,stack:5 -memoryInitials=heap:100%,metaspace:100% -totMemory=$MEMORY_LIMIT) && JAVA_OPTS="-Djava.io.tmpdir=$TMPDIR -XX:OnOutOfMemoryError=$PWD/.java-buildpack/open_jdk_jre/bin/killjava.sh $CALCULATED_MEMORY" && eval exec $PWD/.java-buildpack/open_jdk_jre/bin/java $JAVA_OPTS -cp $PWD/. org.wso2.msf4j.example.Application`

Showing health and status for app hellowso2 in org micropcf-org / space micropcf-space as admin...

OK

requested state: started

instances: 1/1

usage: 1G x 1

instances
urls: hellowso2.local.micropcf.io

last uploaded: Mon Apr 4 10:09:42 UTC 2016

stack: cflinuxfs2


buildpack: https://github.com/cloudfoundry/java-buildpack.git


   state   since                  cpu  memory      disk            details
#0 running 2016-04-04 03:42:38 PM 0.0% 45.5M of 1G 141.2M of 1G
 |
| Hello WSO2 |
Now that you have deployed an application in Cloud Foundry, let's try to deploy a docker image as the next step.
1. I will be creating a docker image to execute 'HelloWS02' sample at MSF4J. Here's my Dockerfile. Enter the following content in an empty document and save it with name 'Dockerfile'.3. Using the docker image for MSF4J and deploying it with Diego
If you need to deploy docker images, you have no other option instead of deploying it with Diego. The reason is that docker support is only enabled with Diego, the new run time for Cloud Foundry.
To enable docker support, you cannot use PWS with free trial version, because that does not grant you administrator privileges. So let's see how we can deploy a docker image on Cloud Foundry.
There are few limitations !!! Still Cloud Foundry does not support pushing docker images that are located in our machines or private registries. Hence Cloud Foundry expects docker images to be available publicly at Docker Hub. Therefore we need to create an image, build it and and push it to Docker Hub first. Let's go through the process step by step.
Creating the docker image
FROM java:8


ENV MSF4J_JAR helloworld-1.0.0.jar

ENV MSF4J_HOME /srv/msf4j

ENV PATH $MSF4J_HOME:$PATH


RUN mkdir -p "$MSF4J_HOME"

COPY "$MSF4J_JAR" "$MSF4J_HOME/"


WORKDIR $MSF4J_HOME


EXPOSE 8080


CMD ["java", "-jar", "helloworld-1.0.0.jar"]
2. Build the 'HelloWSO2' sample using 'mvn clean install' and make sure that you pile up the helloworld-1.0.0.jar and Dockerfile in a single folder.
3. Navigate to that folder using command prompt and make sure the Dockerfile is in the current directory by typing cat Dockerfile.
4. Now, build your new image by typing the 'docker build -t wso2msf4j .' command in your terminal (don’t forget the . period).
The 'docker build -t wso2msf4j .' command takes the Dockerfile in the current directory, and builds an image called wso2msf4j on your local machine. The command takes about a minute and its output looks really long and complex. I will describe what each message means.
nanduni@nanduni-TECRA-M11:~/msf4j/$ docker build -t wso2msf4j .


Sending build context to Docker daemon 5.231 MB

Step 1 : FROM java:8

 ---> 759d5a0d3218

Step 2 : ENV MSF4J_JAR helloworld-1.0.0.jar

 ---> Running in 2924a6314e0a

 ---> 0ff42f38c58f

Removing intermediate container 2924a6314e0a

Step 3 : ENV MSF4J_HOME /srv/msf4j

 ---> Running in 9241e19b8482

 ---> 2357cc884fa3

Removing intermediate container 9241e19b8482

Step 4 : ENV PATH $MSF4J_HOME:$PATH

 ---> Running in 011310cf58b9

 ---> 1fa7456d8fc5

Removing intermediate container 011310cf58b9

Step 5 : RUN mkdir -p "$MSF4J_HOME"

 ---> Running in 65a30507a100

 ---> 0ba7e1e11e39

Removing intermediate container 65a30507a100

Step 6 : COPY "$MSF4J_JAR" "$MSF4J_HOME/"

 ---> abcfee3f60b5

Removing intermediate container e6bca2d017da

Step 7 : WORKDIR $MSF4J_HOME

 ---> Running in 727429c52899

 ---> 3047e68303c5

Removing intermediate container 727429c52899

Step 8 : EXPOSE 8080

 ---> Running in 9a87f646dfe5

 ---> a7682faf838c

Removing intermediate container 9a87f646dfe5

Step 9 : CMD java -jar helloworld-1.0.0.jar

 ---> Running in e7547a9db9b6

 ---> bc027a9b227a

Removing intermediate container e7547a9db9b6

Successfully built bc027a9b227a
First Docker checks to make sure it has everything it needs to build by sending build context to Docker daemon 5.231 MB. Then, Docker loads with the java:8 image. It already has this image locally in my machine. So, Docker doesn’t need to download it. If it's not in your machine, then Docker will download it. There after Docker moves to the next steps in the Dockerfile step by step. Finally, Docker finishes the build and reports its outcome.
5. Run the image and verify if that works as intended. Before that, check if the image is available in your machine by typing docker images. This command will list the images you have locally.
nanduni@nanduni-TECRA-M11:~/msf4j$ docker images

REPOSITORY            TAG                 IMAGE ID            CREATED             SIZE

wso2msf4j             latest              bc027a9b227a        About an hour ago   648.1 MB

java                  8                   759d5a0d3218        12 days ago         642.9 MB
Now run your new image.
nanduni@nanduni-TECRA-M11:~/msf4j$ docker run -p 8080:8080 wso2msf4j

2016-04-05 08:26:02 INFO MicroservicesRegistry:76 - Added microservice: org.wso2.msf4j.example.HelloService@30946e09

2016-04-05 08:26:02 INFO NettyListener:56 - Starting Netty Http Transport Listener

2016-04-05 08:26:03 INFO NettyListener:80 - Netty Listener starting on port 8080

2016-04-05 08:26:03 INFO MicroservicesRunner:122 - Microservices server started in 1887ms
You will see through the logs that the Microservices server has started successfully. Furthermore, access http://localhost:8080/hello/wso2 through the browser and check if you get the 'Hello wso2' message.
6. Now that we have built the image, let's tag and push it to Docker Hub.
nanduni@nanduni-TECRA-M11:~/msf4j$ docker tag bc027a9b227a nanduni/wso2-msf4j:latest
nanduni@nanduni-TECRA-M11:~/msf4j$ docker login --username=nanduni --email=nandunibw@gmail.com

Password:

WARNING: login credentials saved in /home/nanduni/.docker/config.json

Login Succeeded
nanduni@nanduni-TECRA-M11:~/msf4j$ docker push nanduni/wso2msf4j
10. Let's pull the image and see if that works as intended. But before that we need to delete the two images nanduni/wso2msf4j and wso2msf4j form our local system.
Use the docker rmi to remove them. You can use either the ID or the name to remove an image.
$ docker rmi -f nanduni/wso2msf4j


$ docker rmi -f wso2msf4j
11. Pull and load a new image from your repository using the docker run command. Since the image is no longer available on your local system, Docker downloads it.
nanduni@nanduni-TECRA-M11:~/msf4j$ docker run -p 8080:8080 nanduni/wso2-msf4j

Unable to find image 'nanduni/wso2-msf4j:latest' locally
latest: Pulling from nanduni/wso2-msf4j

fdd5d7827f33: Already exists

a3ed95caeb02: Already exists

0f35d0fe50cc: Already exists

7b40647e93b7: Already exists

95109706d468: Already exists

938141337517: Already exists

7ff1af1d8f09: Already exists

e8a4e33c1725: Already exists

ec40bd691d34: Already exists

1d532cea3622: Pull complete

f77d1bb4550b: Pull complete

Digest: sha256:7369ab704dd0af8d704541145be1b5086770ffa54eb687f9887f3ff3f586c4f1

Status: Downloaded newer image for nanduni/wso2-msf4j:latest

2016-04-05 09:24:25 INFO MicroservicesRegistry:76 - Added microservice: org.wso2.msf4j.example.HelloService@30946e09

2016-04-05 09:24:25 INFO NettyListener:56 - Starting Netty Http Transport Listener

2016-04-05 09:24:26 INFO NettyListener:80 - Netty Listener starting on port 8080

2016-04-05 09:24:26 INFO MicroservicesRunner:122 - Microservices server started in 1728ms
You will see through the logs that the Microservices server has started successfully. Furthermore, access http://localhost:8080/hello/wso2 through the browser and check if you get the 'Hello wso2' message.
Enabling docker support with Diego
To allow Docker-based applications to run, a Cloud Controller administrator can enable the diego_docker feature flag with the following command.
$ cf enable-feature-flag diego_docker
To disallow Docker-based applications, a Cloud Controller administrator can run the following command.
$ cf disable-feature-flag diego_docker
Pushing a docker image with Diego
Versions 6.13.0 and later of the CF CLI include native support for pushing a Docker image as a CF app, with the cf push command.
To push the image that we have created, use this command.
nanduni@nanduni-TECRA-M11:~/msf4j$ cf push hellowso2 -o nanduni/wso2-msf4j

Creating app hellowso2 in org micropcf-org / space micropcf-space as admin...

OK


Using route hellowso2.local.micropcf.io

Binding hellowso2.local.micropcf.io to hellowso2...

OK


Starting app hellowso2 in org micropcf-org / space micropcf-space as admin...

Creating container

Successfully created container

Staging...

Staging process started ...

Staging process finished

Exit status 0

Staging Complete


0 of 1 instances running, 1 starting

1 of 1 instances running

App started


OK

App hellowso2 was started using this command `java -jar helloworld-1.0.0.jar`

Showing health and status for app hellowso2 in org micropcf-org / space micropcf-space as admin...

OK


requested state: started

instances: 1/1

usage: 1G x 1 instances

urls: hellowso2.local.micropcf.io

last uploaded: Tue Apr 5 10:02:30 UTC 2016

stack: cflinuxfs2

buildpack: unknown

   state   since                  cpu  memory  disk    details

#0 running 2016-04-05 03:32:57 PM 0.0% 0 of 1G 0 of 1G
You will see through the logs that the application has started successfully. Furthermore, access http://hellowso2.local.micropcf.io/hello/wso2 through the browser and check if you get the 'Hello wso2' message.
You have finally deployed WSO2 MSF4J samples on Cloud Foundry using three approaches. As I experience, the difficult part is to setup Cloud Foundry. Once you setup Cloud Foundry in your machine, everything is easy and clear. You just have to push the applications, and Cloud Foundry will take care of rest of the things.
You have finally deployed WSO2 MSF4J samples on Cloud Foundry using three approaches. As I experience, the difficult part is to setup Cloud Foundry. Once you setup Cloud Foundry in your machine, everything is easy and clear. You just have to push the applications, and Cloud Foundry will take care of rest of the things.
Awesome read!
ReplyDeleteIt was a great information. Thanks for sharing.
ReplyDeletePivotal Cloud Foundry Online Training
mobile phone repair in Lafayette
ReplyDeleteiphone repair in Lafayette
cell phone repair in Lafayette
phone repair in Lafayette
tablet repair in Lafayette
ipad repair in Lafayette
mobile phone repair Lafayette
iphone repair Lafayette
cell phone repair Lafayette
phone repair Lafayette
Thanks for sharing this informative content , Great work
ReplyDeleteLeanpitch provides online training and certification in Scrum master during this lockdown period everyone can use it wisely.
Scrum master certification
Very well written about Cloud Foundry. If you want videos of Cloud Foundry, please download vidmate. With Vidmate App, you can stream any video of your choice online. Streaming videos with this app is very easy. This is a free application so you can easily stream videos from it without spending a single penny. In Vidmate App, you can watch any video as many times as you want, there is no limit to watch the video of your choice. This is a completely free app, so you do not need to pay anything to watch videos, in this you can also download videos of your choice and share them with your friends. You can also download Cloud Foundry and Vidmate from 9apps
ReplyDeleteThanks for sharing this one with me. It's very helpful and nice information about to Linux VPS Hosting and its Many Benefits this is so informative and useful for everyone. If you are looking for fastest and Cheap Linux VPS Hosting you can ask us for more details and services.
ReplyDeleteA window company specializes in the manufacturing and installation of windows. Often, the services cater to both commercial and residential buildings. When looking for a reputable window company, it is important to consider factors such as their experience, reviews, and quality. Conducting research online and asking for recommendations from friends, family, or industry professionals can help you find a reputable window company. A reputable window company should also have a good warranty and offer excellent customer service. At Delwood Group, we ensure that you have a positive experience during the window repair process.
ReplyDeleteWood refinishing is a critical process for log homes as they are particularly susceptible to damage. Log homes are made of wood, and wood is a natural material that requires regular maintenance to ensure longevity. Refinishing wood involves removing old finishes, repairing any damages, sanding, log home staining. Also, it includes applying a new finish to the wood to protect it from further damage. Log homes are often exposed to the elements, and refinishing the wood can help to protect the home. This service is common to log homeowners that haven't renovated their home in a long time. Our service can give the home a fresh new look and improve its curb appeal. As a log home restoration company, providing wood refinishing services is essential to extending the life of your home.
ReplyDelete